HANGING A TREESTAND? A BEGINNER'S GUIDE TO CHOOSING AND HANGING THE RIGHT STAND FOR YOU!
Whether you hunt public or private, knowing how and where to hang a treestand is one of the key factors in separating hunting failures and successes. Hanging stands and trimming shooting lanes use muscles and cause next-day body aches that you would soon rather forget. Being meticulous and methodical in your treestand preparation will make you a better hunter this fall.
STARTING YOUR JOURNEY AS A SORT OF ARBORIST
There are three types of tree stands a hunter can choose: a climber, a ladder, and a hang-on. A very basic ease of use is described below. Regardless of which stand is right for you, there are some factors to consider when selecting a tree:
1. Most importantly, make sure the tree does not appear dead
2. Try choosing a tree that is shoulder width or about 24” wide
3. Pick a tree that provides concealment especially behind you
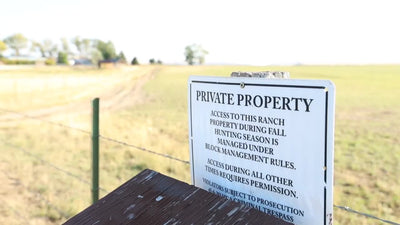
4. On private property, ask the landowner about screwing in steps and trimming trees
5. On public property, be aware of all State rules and regulations
A climber stand has a top and bottom portion that are not attached together. The sections are fastened to the tree using a band that wraps around the back of the tree. The hunter faces the tree and stands up to move the top section up by lifting it with their hands. The hunter then sits down on the top section to move the bottom section up by lifting their legs up with feet secured to straps. The hunter does this repeatedly until the desired height to hunt is achieved.
A ladder stand is what it sounds like. A 15’-20’ ladder that has a standing platform and seat on the top. These stands are in sections that are combined forming the ladder. The ladder rests flat on the ground and the top is slowly maneuvered toward the tree with the help of two to three people. Once the top section “V” is resting on the tree, secure the brace bracket, and a slow climb to the top is necessary. Ratchet straps, preferably two, will secure the top section to the tree.
While all stands have their merits, this article is dedicated mainly to the hang-on variety. The hang-on has several distinct advantages including function, set-up, and versatility.
ALL HANG-ON STANDS ARE NOT CREATED EQUAL
The first thing to look for is a Treestand Manufacturer’s Association (TMA) logo somewhere on the box. The TMA is a nonprofit trade association that specifically devotes its resources to promoting treestand safety through education. By doing so, they improve treestand safety with the support of its members and by fostering relationships with organizations that have similar goals1. A TMA marked box will include a fall restraint system.
Hang-on stands can be purchased anywhere from used on LetGo to over $200 brand new. Let your budget dictate which direction you go. However, when purchasing a used hang-up, make sure to tighten all bolts, double check that the I-beam cable is not frayed, and purchase new straps.
NOT ALL TREES ARE CREATED EQUAL: 3 STEPS TO FIND THE KILL TREE
Oaks, maples, pines, cedars…if the tree has cover and is not dead, you are 1/3 done selecting the right tree. If you cannot reach your arms around the tree, this makes it difficult to connect hanging straps. If the tree is crooked, you are going to lean and this can make for a very uncomfortable sit.
Xtreme Outdoor Products (XOP) makes an offset quick connect bracket that I used for the first time this season. It features slots at different angles that eliminates a tree’s lean and makes hanging their stand almost effortless2.
The next 1/3 comes from making sure deer are frequenting the area. This is accomplished by knowledge of the property, reading deer sign, knowing where deer bed, and utilizing trail cameras. Whether it is a trail camera you check weekly or a cellular camera that sends images to your electronic device, Exodus makes a fantastic version for each application: 1. Exodus Trek Exodus Outdoor Gear Render 2. Exodus Lift II Exodus Outdoor Gear Lift II 3. Exodus Render Exodus Outdoor Gear Render 4G

If you have been hunting a property for several years, you should have deer movement figured out by now. Find several well used trails that come together and form a funnel or pinch-point. If a tree exists that you can hang a stand on near here, that tree would be your best friend.
The final 1/3 is the most crucial, yet often overlooked: selecting a tree that has multiple entrance and exit routes. There is no fun in putting in all the work to scout and hang a stand, only to not be able to properly sneak in and out. Your entrance and exit routes can make or break your hunts. These should be clear of all ground cover (leaves, branches, etc) and any vegetation that is growing. Leaves and branches make more noise than you think. When your clothes touch a hanging branch or tall grass, you are leaving scent behind. The mindset you need to have is to become the greatest burglar of all time, one who is never detected or caught. You undoubtedly will have more success as your preparation will meet opportunity in the fall.
STARTING FROM THE GROUND UP
Once you have selected a tree, the fun begins. Screw-in steps, connected climbing sticks, and mobile hunting sticks are going to be your main choices. Connected climbing sticks are the most affordable and easiest to set up. They also make very little noise and do not damage trees. You strap the first one to the tree, then connect the remaining sticks together and strap them to a tree until you have reached your desired hunting height. Stands are usually hung anywhere from 16 - 25 feet off the ground. I like to use a ratchet strap to better secure the final stick to the tree.
Wearing a lineman’s harness that features a belt is the safest way to keep you connected to the tree and is a safety precaution must. There are several manufactures that make excellent safety harnesses: 1. Hunter’s Safety System (HSS) https://huntersafetysystem.com/ 2. Muddy https://www.gomuddy.com/tree-stand-safety-harness/ 3. Summit https://www.summitstands.com/harnesses 4. Hawk https://shop.hawkhunting.com/hunting-accessories/safety-harnesses/
You will have the freedom of using both of your hands and the peace of mind of being secured to the tree. I have an adjustable tethered strap that is attached to my lineman’s harness that has locking D-shaped carabiners on each end.
Connect your lineman’s strap to one carabiner, place the lineman’s strap around the tree, then connect your lineman’s strap to the carabiner on the opposite side of the tree. Begin climbing up and setting the sticks. Reassess your lineman’s harness after each step up.
Take a screw-in step or hook (check your local rules and regulations to make sure this is legal) and attach it about one foot higher than where you want to hang your stand. Pull your stand up using the rope and hang the stand from the hook.


If you have a lifeline, this is the best time to attach it. When you are safely standing on your highest stick, secure the lifeline to the tree. Attach your harness tether strap to the prusik knot and you can detach the lineman’s belt now. You can watch YouTube videos on how to make your own lifeline or there are several manufacturers that sell single or three packs: 1. HSS Reflective Lifeline https://huntersafetysystem.com/products/reflective-lifeline 2. X-Stand Safe Climb https://www.x-stand.com/product/safe-climb/ 3. Muddy Safe-Line https://shop.gomuddy.com/the-safe-line/
Nearly 80% of all hunting related accidents and deaths occur when climbing in and out of a treestand. Do whatever is necessary to make sure your ascent and decent are done methodically and safely.
Set your treestand’s straps around the tree and loosely tighten them. Take the stand off the hook, tighten the straps more, and double check the stand’s level prior to the final tightening. When on the platform check to make sure there is no wobble and the straps are tight around the tree. Using a strap on the top and bottom provides the best peace of mind when securing your stand to a tree.
Carefully move yourself to the stand’s platform. While standing, adjust the lifeline’s knot about two feet above your head. When descending, always move the Prusik knot down with you while maintaining three points of contact on the climbing sticks . Once you reach the ground, the final step is to tie the end of the lifeline to the bottom of your tree. A lifeline typically is 30 feet long, so you should have plenty of leftover line to secure it properly. You can safely climb up and down your sticks while your safety harness is constantly attached to both you and the tree.
GETTING READY FOR OPENING DAY
Shooting lanes are a tedious, time sucking, mundane chore. Who cares, do it. A telescoping tree pruner, a good set of branch shears, and a handheld saw are the minimum items you are going to need. Some hunters believe less is more when it comes to trimming out shooting lanes. I prefer the lumberjack method and hack everything that could potentially affect my shot while still maintaining enough cover around me. A limb will grow back. A shooting opportunity may occur once.
TIP: If you think you have trimmed enough shooting lanes, trim one more
A few convenience items I like having are treestand accessory hooks and a bow hanger. The accessory hooks allow you to hang items like a backpack, calls, and such. A bow hanger is great at placing your bow in an easy to reach position. Remember to have your bow grip at a proper hand height and make sure the hanger is in a place where it will not obstruct your shot. Typically, you want the hanger to be on your weak hand side to avoid reaching across your body.
A lot can go into hanging a tree stand. Flush your wrong tree memories down the toilet and fondly recall the correct trees like you found them yesterday. You can put as much effort in as you want, but the effort you select directly correlates to the reward you earn.
1https://www.tmastands.com/ TMA’s Mission Statement 2https://xopoutdoors.com/products/offset-quick-connect-bracket XOP’s Quick Connect Bracket
Author: Exodus Black Hat Team Member Geoff Guzinski